
Let’s face it: Summer is ending and we all knew it was coming once the summer solstice came and went.
We’ll soon have to dig out our bike trainers and prepare our pain caves for winter training.
Indoor training has become more popular especially with winter approaching. And, some may not want to pay for gym memberships and trudge through the snow and wet weather conditions on a bike.
This is why it’s even more important to create a creative and energy-inspiring space for the winter.
This could help you jump out of bed and get a good workout in or hitting the snooze button.
Not sure what a pain cave is and why it’s important. Or, even what goes in it?
No worries, we’ll help you pick out the essentials for your unique pain cave. And, you can always change as you become more invested in the sport.
Indoor Pain Cave Basics
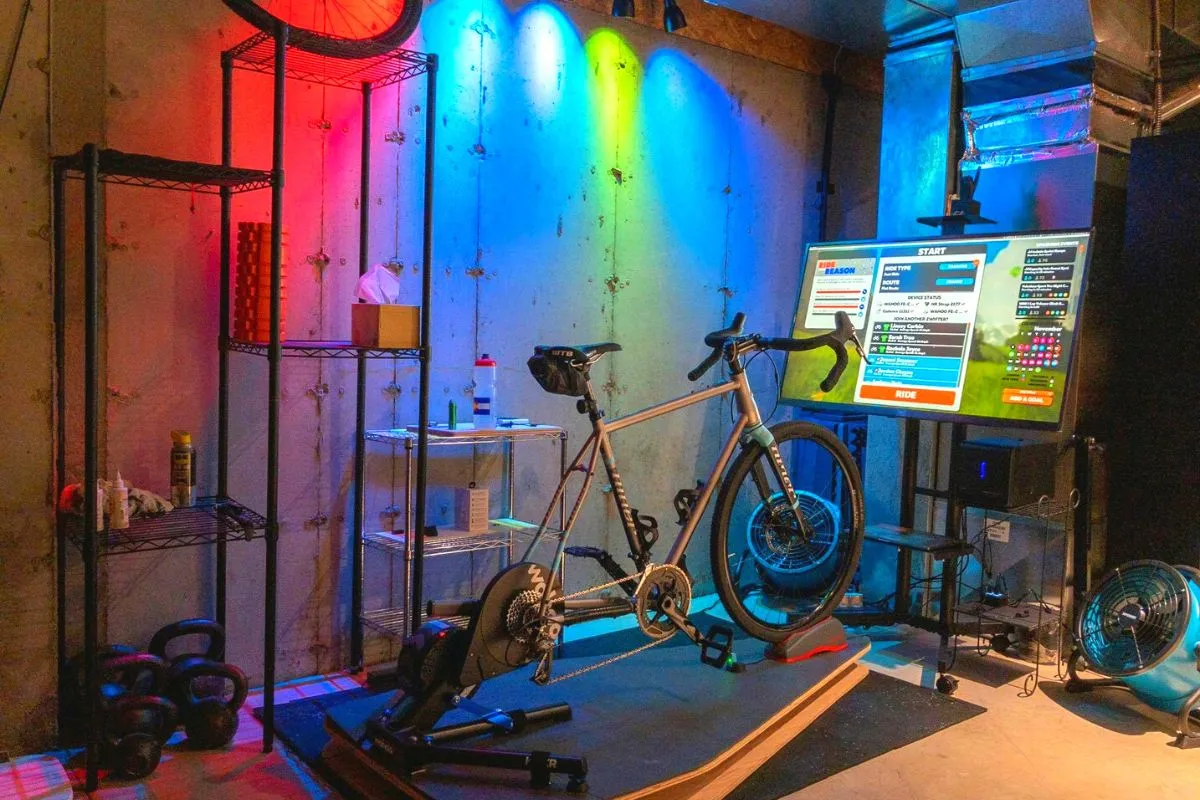
What is a Pain Cave
A pain cave is a space where you can work out and become stronger during the winter months. It usually contains your bike trainer at least and some other home gym accessories such as a yoga mat and a couple free weights.
Winter training can feel “numbing” because you’re biking while looking at a blank wall. So, most triathletes will do decorate their pain cave with mementos.
There’s nothing quite like the pain cave. It’s a special place where mind and body come together in perfect harmony – and pain. It’s a place where you push yourself to the limit, and then keep going. Some people say that the pain cave is a state of mind, but I think it’s more than that. It’s a physical place where your body and mind are working together to get you through whatever it is you’re trying to accomplish.
Whether it’s a long run, a tough workout, or even just a difficult day, the pain cave is there to help you get through it. So next time you’re feeling pain, don’t fight it – embrace it, and find your way to the pain cave.
How to Make Training in a Pain Cave more Fun

Riding on your bike trainer is never fun, but it can be more bearable with a couple tricks.
If you don’t have a smart trainer, there are a couple options as you following your training plan.
One, you can listen to music as you complete the workout.
Two, look up YouTube videos of people who GoPro their outdoor rides and pretend you’re riding somewhere else.
Three, combine options one and two.
Four, mix things up. If you have a long ride, try doing half of it on your bike trainer and the other half on bike rollers.
Five, join a live-stream of one of your friends or coaches as they lead their smart trainer rides.
For those who have a smart trainer, winter training far more bearable since it is more interactive. You can join your friends for a “group ride” every week. Or, set up a ride that mimics one of your outdoor rides.
In short, a smart trainer gives you more options to stay engaged while on the bike trainer especially for longer rides.
Six, get off the trainer and try riding on rollers. It’s more challenging and is a more “natural” way of equalizing your power between your legs.
How Can I Stay Motivated in a Pain Cave?
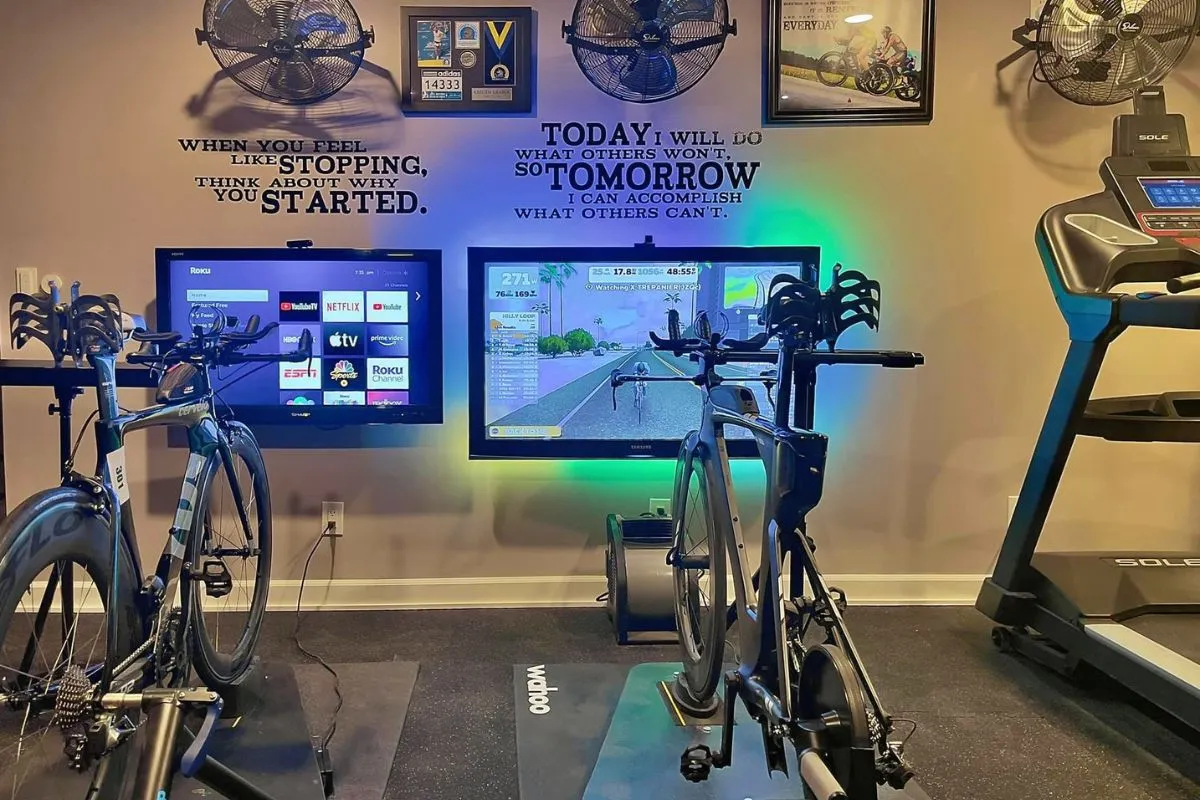
Honestly, and this happens to the best of us, we forget what we’re working towards as the winter days blend together.
We can spark inspiration and keep track of our goals not just on our phones or computers.
Decorate the walls of your pain cave with posters of your favorite pros and or even a picture of you and your friends or family at a race.
Write out your training goals and have a way to track your progress. You can also put this on a wall of your pain cave.
Now, that we know what a pain cave is and how to stay entertained in it, let’s talk about the essentials.
Perfect Pain Cave Essentials
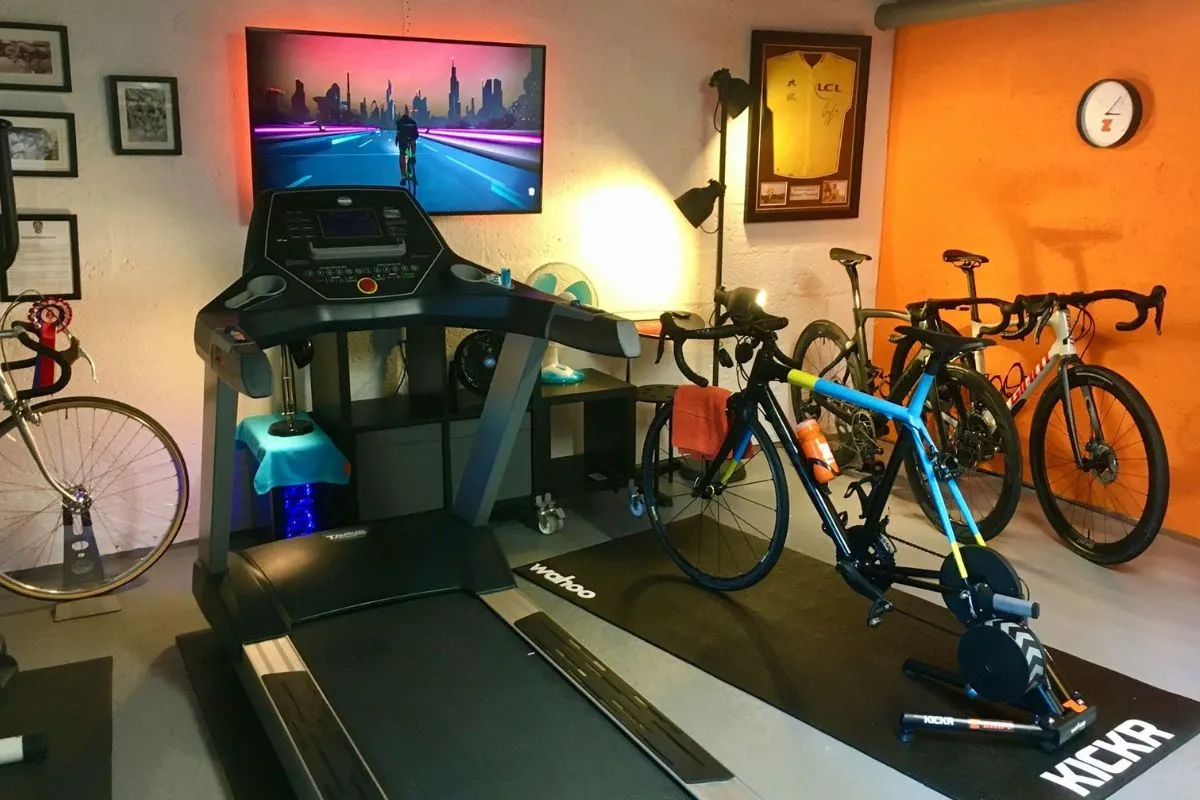
The Right Place for a Pain Cave
A spare room or part of a garage is the most ideal option if that’s available to you. If you have limited space options, a hallway or low-traffic room would be a good place to start.
Some people have turned a shed into a pain cave. Just be that the shed is weatherproof if you pursue this option.
For those who live alone, you can turn an office or part of your living room into a pain cave for the winter.
Smart Bike or Bike Trainer
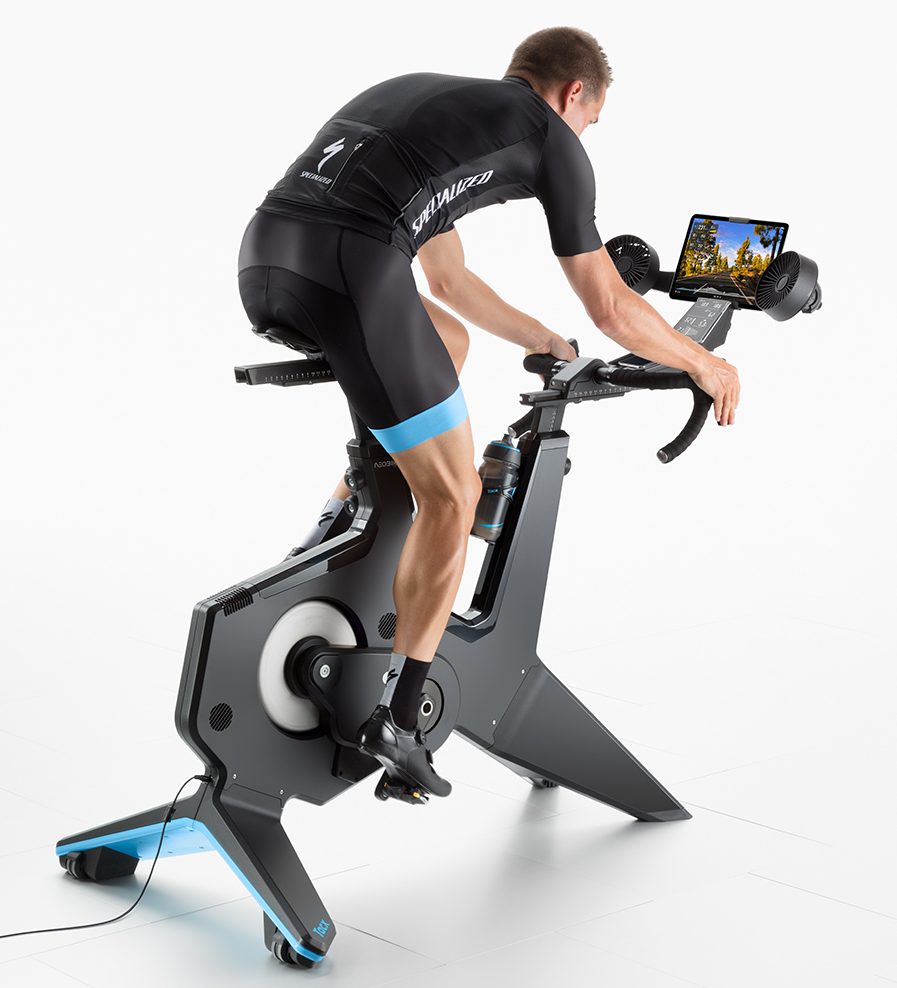
The smart bikes or bike trainers are the main show of the pain cave and where most, if not, all of your winter workouts will take place.
You must find a bike trainer that is right for you! And, you can always add rollers into the mix.
There are a few things to keep in mind while shopping for a bike trainer:
- How quiet is it?
If you live with roommates or in an apartment building, you don’t want to disturb the neighbors or living mates that much.
- Is the trainer easy-to-use?
Consider how easily you want to use your bike trainer.
If you’re looking for something that is small and can travel with you, you might want a liquid trainer or a basic one.
If you’re more “grounded” maybe you want a road-simulated ride, and want a smart trainer with a flywheel.
- Do you need to connect to training apps?
Some trainers called “smart trainers” can connect to apps and stream your metrics and workout progress live.
These trainers are more interactive and have really neat features. And, have more capabilities than a regular trainer would offer.
What type of trainers are available?
Smart Trainers
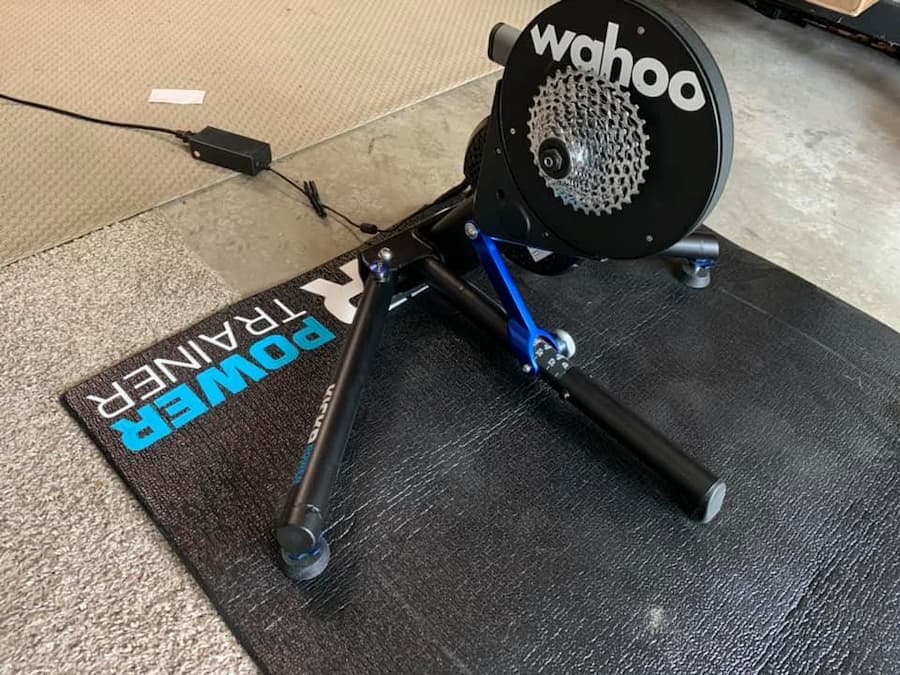
Smart trainers can connect to training apps such as TrainPeaks, Zwift, and Wahoo, which lets riders complete workouts and customize what metrics to display.
A smart trainer simulates riding on the road very well, which is why so many people go for them.
Some smart trainers offer virtual interactions such as group rides and races with your friends. Zwift offers this service.
For some of these trainers, you need to take the back wheel off and attach it to the trainer. Or, it comes with a flywheel which adds resistance and adds to a more road-like ride.
Fluid Trainers
Not everyone wants or can afford a smart trainer, which is understandable.
Fluid trainers won’t give you a real-life feeling when you’re working out but it will help strengthen your biking legs.
All fluid trainers require you to attach your whole bike, which is much simpler than a smart trainer. And, The back tire rotates on a roller which creates the resistance.
Rollers

Rollers aren’t the most popular option but they are a good option if you have a low-intensity workout to do.
The rollers require you to stay in the center of the cylinders and be very conscious of how your body movement affects the bike. Otherwise, you become off-center or fall off the rollers.
If you’re trying to improve your balance on the bike or even your power between your legs, rollers are an excellent choice. If you can “master” the rollers, you’ll be fine on the road.
Bike Sensors, ANT+/Bluetooth Connection
Bike sensors and heart rate monitors are great tools to have to track your progress. And, these can be used on a fluid bike trainer too if you want to track specific metrics.
A heart rate monitor can either be used on your sports watch or you can buy a heart rate monitor strap. Whichever one feels more comfortable to you.
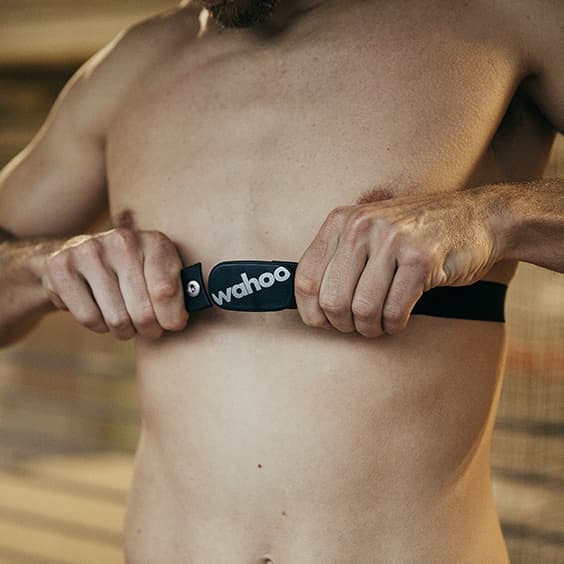
A heart rate monitor is very useful if you are training using heart rate zones. This ensures that you are training at the right intensity and avoiding a plateau.
You can track your cadence and speeds with bike sensors. These attach to your bike pedals and hubs. It tracks your revolutions and can tell you how fast and far you went, even when you’re indoors.
All these metrics can be synced to your Garmin account, for example, and then synced with TrianingPeaks. These metrics can be “live-streamed” to your bike computer if you’d like to set it up that way.
For people who don’t have smart trainers, this is a great way to track your progress and keep you motivated while you get through the winter months.
Fan
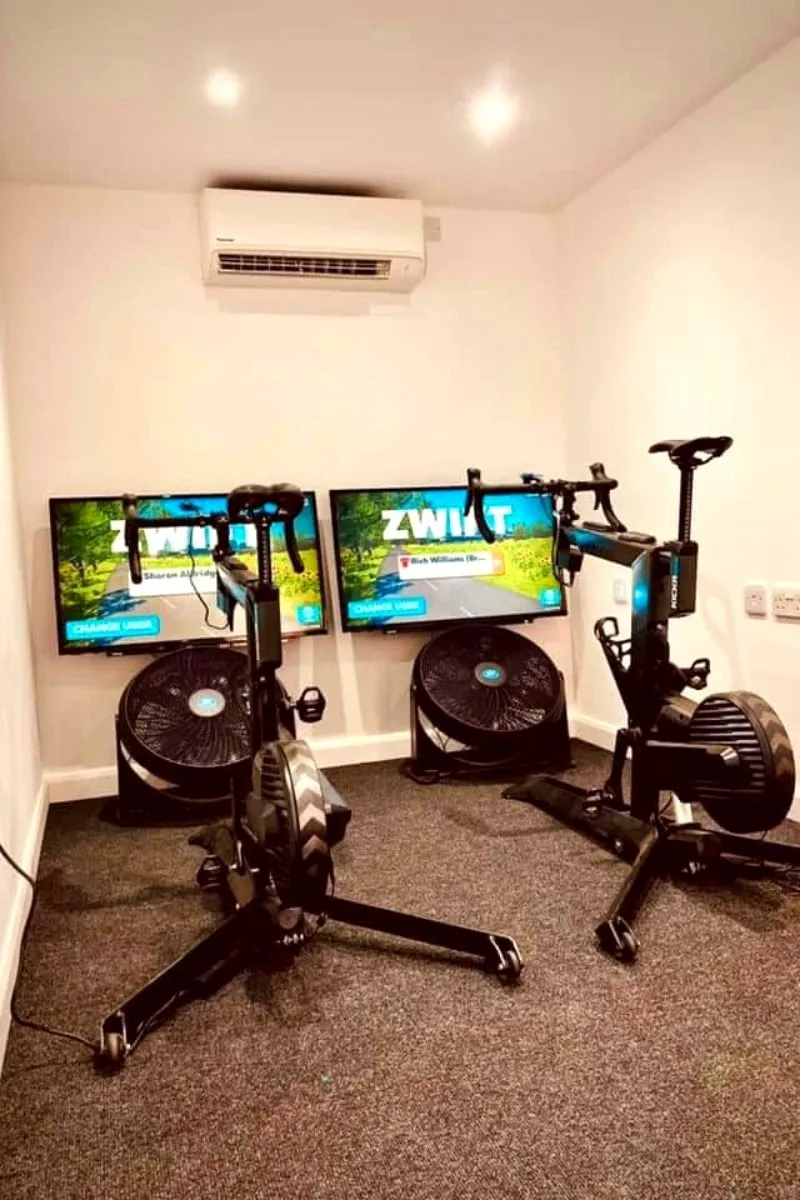
You’ll need a fan in your pain cave at some point.
You’ll be surprised that you can easily choose the wrong type of fan for your pain cave.
Don’t just pick any fan because you might end up with one that just pushes around the hot air. This will make things very uncomfortable and you might overheat.
Generally, you’ll want a high-pressure fan with directional and focused airflow.
If you’re on a budget a simple free-standing fan you’ll find in a gym will do.
For those who can spend a little more money, look for a fan with targeted directional airflow. This allows you to feel comfortable for the entire workout. Look for ones that can be controlled by a remote so you can stay on the trainer and adjust the airflow.
And, finally, for those who can “splurge” shop for a smart trainer that has a built-in fan. The trainer will sense your efforts and adjust the resistance accordingly. You’ll be able to focus through the entire workout and feel comfortable.
Some smart trainers such as Wahoo has a headwind feature that syncs with your heart rate monitor. This means that when your heart rate increases so do the effects from the fan.
TV/Laptop/iPad
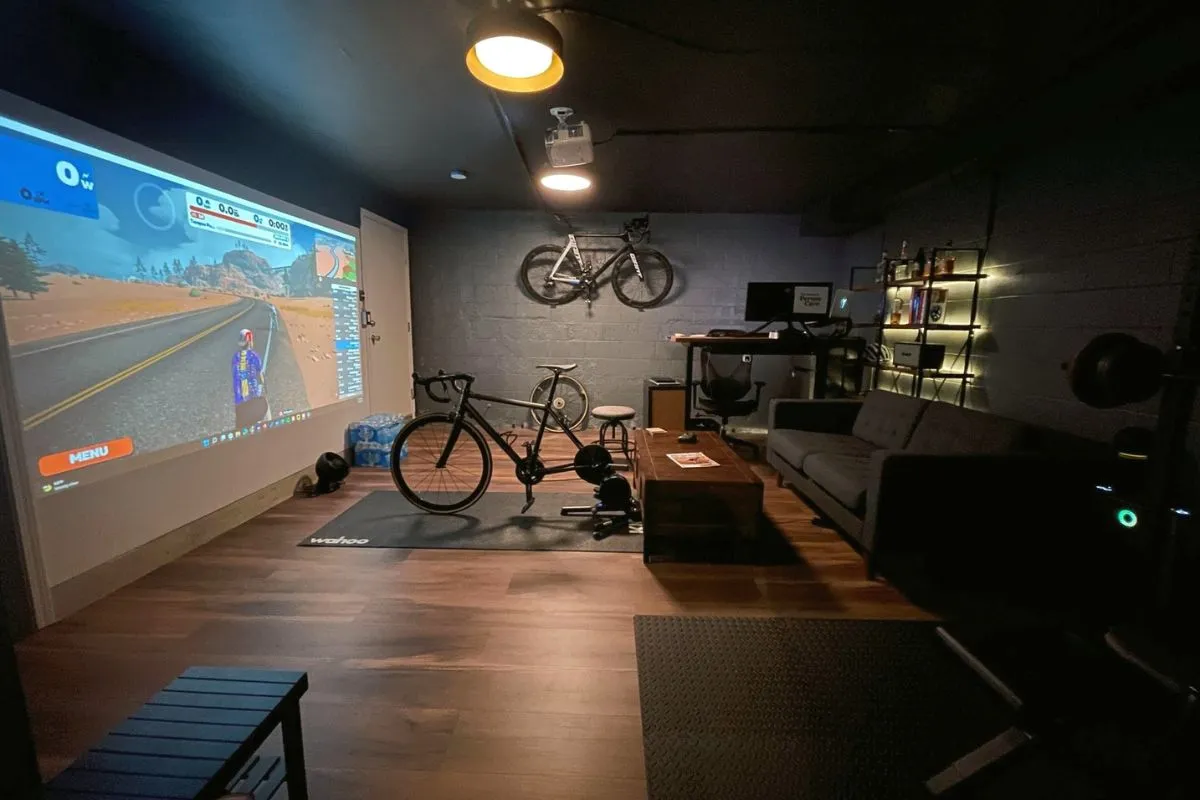
Electronics can be used as tools and a source of entertainment while you’re on the trainer.
For basic trainers, you might want to set up your trainer in front of a desk (doesn’t matter what type) where you’ll put your device. You can display a YouTube video of people biking or for long rides a show or movie on Netflix.
For those who like to see their metrics displayed live, a TV, Laptop, or iPad works well. This option is frequently used for those who have smart trainers too.
You have the option for your devices to sync to your desired device and have the device display your metrics in real-time. You can also see your workout on the screen instead of glancing at your watch every few minutes.
For those with smart trainers having some type of device is essential. After all, you bought the smart trainer for the virtual interactive features. This means you need a way to display it.
Smart trainers can connect to devices and display your metrics and workouts at once. And, for those who have Zwift, you can see your virtual avatar bike with others on the app. Of course, you can ask your friends to “meet” you on Zwift for a fun ride or to race them.
Indoor Grade Simulator/Rocker Plate
An indoor grade simulator changes your game and can make riding indoor feel more fun and even like you’re biking outdoors.
The device lifts the front end of your bike and lowers it to mimic riding up and downhills.
To set this up, you’ll need to make sure that your bike trainer and indoor grade simulator are compatible. Otherwise, you’d risk damaging your bike.
You’ll need to remove the front wheel from your bike and attach the fork to the device. On some devices, you’ll need to press a button so that the simulator and the smart trainer can sync up.
The grade simulator can either be synced up to your smart trainer so it moves according to your workouts. Or, you can manually set the grade if you get nauseous from it lifting you up and down.
Typically, though, the simulator works with a smart trainer and is controlled with it. The training apps send the workout to the trainer and then the trainer “communicates” grade adjustments to the grade simulator.
This is still a relatively new tool for pain caves so be sure that your smart trainer and grade simulator is compatible.
How does the rocker plate work?

Once you assemble the rocker plate (motion platform), you’ll be able to put your trainer and bike on it. And, the platform has a built-in wheel block that will keep your front wheel stable.
The platform moves forward and backward on a curved metal track and side to side tilting.
The more effort you put into the bike, the more you’ll move forward and backward on the platform. And, each pedal stroke simulates the side-to-side movement you feel when biking on the road.
The downside is that while the platform is responsive and tries to mimic riding outdoors, it does fall short. Especially for sprinting.
The platform leans right when you have your right foot down and left for the left foot. This is the opposite of what would happen on the road. You can adjust to this movement on the platform, but it won’t help you biking outdoors.
How will this tool help cyclists and triathletes?
The platform helps you build a stronger core on the bike. And, the small movements on the platform forces your butt to adjust as it would on an outdoor ride.
I’d recommend this to those who do a lot of long rides on the trainer during winter training.
Desk or Stand

This was talked about briefly, but you’ll need somewhere to store your electronics during your workout and still have it readily available.
And, more and more people want those electronics to create an energy-inspiring and interactive training experience.
It’s recommended to have a look into a desk or stand with an adjustable height. You can put the desk wherever feels best and everything (including your morning drink) will be within reach.
You can put extra hydration or nutrition on the desk or stand for the longer workouts in the saddle if needed.
If you’re on a tight budget and only need to put a few light-weighted things on a table, a music stand can work for this.
Otherwise, I’d look into adjustable desks and stands for this. And, this item isn’t absolutely essential when you first create your pain cave but might be useful down the line.
Headphones
Headphones would be a nice touch so you can listen to your music without disturbing your roommates.
Newer headphones don’t go into your ears, instead they rest on your temples so you can hear more sounds around you. These are wireless (like most technologies) and can be paired with your phone to stream music and even accept calls while you’re on the trainer.
Bone conducting headphones brings you sounds through your bones, as you might have guessed. This type of headphone rests on the front of your ears so you can hear outside sounds while you listen to music.
Every year, these headphones have better technology and become more durable and sweatproof, and have longer battery lives. You’ll need to shop around for what works for you.
If you’re a big fan of smart technologies, look into a Bluetooth helmet. Coros makes a bike helmet with Bluetooth built-in. This lets you listen to music without too many extra devices.
Bike Computer

Bike computers are a great tool to have on your bike and it does more than just keep track of your distance and speed. It can also track your heart rate and other metrics if it has those capabilities.
Bike computers are typically mounted on a bike’s handlebars or slightly in front. In this situation, you can see all your metrics without glancing at your sports watch.
Basic bike computers can keep track of the basics such as speed, distance, and time on the bike. It is very unlikely that the bike computer can sync with a training app, sports watch, or a smartphone. It can be charged with a USB cable and you can upload your data to your computer that way.
There’s nothing wrong with a basic bike computer as long as you don’t need more features.
A mid-range bike computer offers more features than a basic one and has connectivity capabilities. These computers have a bigger screen and display size, customizable data screens, along with syncing options. You can sync it to your phone or one of your sensors on your bike.
For those who want a little more from their mid-range bike computers, they can get a premium-level one.
A premium-level bike computer has all the features of a mid-range bike computer plus it might offer navigation, training modes, multiple storage options, long-lasting battery life, and better resolutions.
Some bike computers are bundled with a speed or cadence sensor. If this is offered, you won’t have to worry about if there will be compatibility issues.
A bike computer is really useful if your bike trainer supports connectivity options (ANT+ FE-C or Bluetooth) otherwise, you won’t be able to see your metrics displayed.
A bike computer works well with a smart trainer and gives you a few exciting options:
- Ride a virtual course – You can create or upload a ride from Strava and the smart trainer will put on more resistance to mimic a ride outside
- Ride a previous workout – Re-ride your favorite outside route during the long winter months
- Ride a coached or structured workout – If your coach has a workout, you can sync it to your bike computer and it will communicate the resistance to the smart trainer
- Ride a manual workout – You can manage when and how much resistance to put on
Triathlon Watch

A triathlon watch is a great tool and one that you’ll see on many multi-sport athletes. It can track your heart rate, step count, speed and distance sleep and wake cycle, and recovery time. It can be synced up to your training app so you can easily access your structured or coached workouts. Most have GPS capabilities.
On top of the sports features, some watches also have “smart” capabilities. If synced with your smartphone, it can show that you have a call or text. Some might let you answer a call but most will just display that it is happening.
Like bike computers, triathlon watches range from basic to premium-level. You need to take an inventory of what you need from a watch to reach your training goals. This means you don’t need an expensive watch if you’re only going to use a fraction of the features.
In my opinion, your triathlon watch should at least track your speed, distance, and heart rate. And, nearly all triathlon watches have a heart rate monitor for your wrist so you don’t need an extra sensor unless you want it.
From those basic metrics, I’d access what else you need and start shopping and talking to your friends or a coach.
Tracking your heart rate is an efficient way to follow your fitness level over time. It can tell you how quickly you can recover from a hard workout. And, if you’re returning to triathlons heart rate can be an indication of your fitness level.
Heart Rate Monitor
I briefly touched on this in the previous section, but wanted to dedicate a whole section to heart rate monitors. To prove that they are very important to your training and answer why you might want an HRM in addition to your watch.
Every device you use is subject to error even if it’s a small percent error. While using a watch as a heart rate monitor is convenient, it is less accurate (but not by much) than a chest strap.
A chest strap heart rate monitor is placed near the heart so it will give you accurate and precise results. If there is a discrepancy between your watch and chest strap heart rate monitor, trust the chest strap.
Sweat Cover
You’ll sweat a lot during your bike trainer workouts, no doubt.
You need to keep your bike clean during the winter so this means having something to protect it from the sweat that drips profusely off of you.
If you don’t protect your bike, it could build up grime and corrosion on the frame and chain.
To combat this, I recommend you buy a sweat cover that attaches to your handlebars and seat tube. This will protect your top tube and chain.
A sweat cover should be made from absorbent material that will hold all your sweat. You can “sweat it out” without worrying about your bike.
A sweat cover (no matter who you buy it from) has elastic parts so that it fits all bikes and is easily installed.
Don’t want to shell out a few dollars for a sweat cover?
No problem, in the meantime, use an extra towel to cover your top tube. Ideally, you won’t use the same towel to wipe down your bike as your sweat cover.
Floor Mat
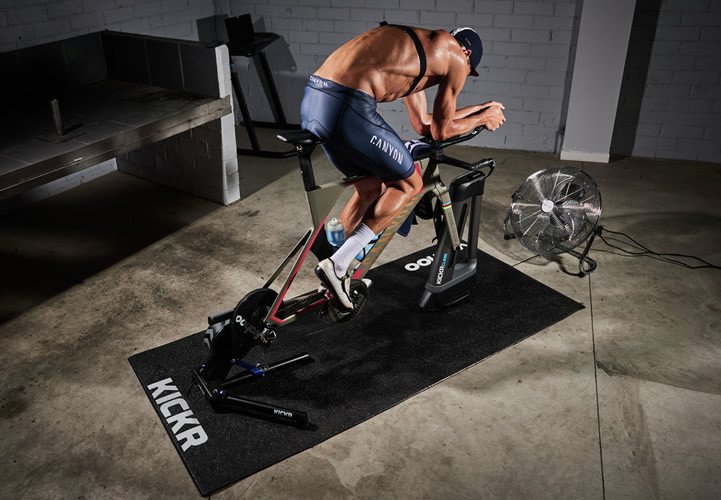
You’ll want a floor mat for your pain cave. If you’re on a budget, a floor rug will do for the time being.
However, a floor mat can reduce the vibrations your trainer makes which would be courteous to your roommate or if you live in an apartment building.
Besides reducing noise and vibrations, a floor mat can hold your trainer in place without any slips. And, the mat’s materials are very easy to wipe down after a tough workout.
If you’re putting your trainer on wood floors, it can help protect it and avoid some discomfort on the bike.
Look for a mat that has grippy materials and is easy to clean-up after a workout. And, be sure that it is waterproof.
Towel
As mentioned in the previous section, you’ll need a towel in addition to a floor mat and sweat cover.
This is mainly because those two won’t catch all the sweat that flies off you. You’ll want to be sure you wipe your bike down each time you finish a workout.
It’s the best way to keep your bike “healthy” throughout the winter.
Chaffing Cream
Chaffing isn’t fun but it happens in some form for cyclists, runners, and swimmers who regularly wear wetsuits.
Chaffing is common and happens when parts of your body rub against each other or your clothing. It can also happen if you’re wearing fabric that irritates your skin.
You’ll notice that your skin has a burning or stinging feeling along with a developing mild, red rash.
The worst-case chaffing leads to swelling and bleeding.
Common areas for cyclists include the thighs and butt area.
Good thing, there are ways to prevent and treat chafing once it happens.
You can wear moisture-wicking underwear or bike shorts when you get on the trainer. It will keep your areas dry and won’t cause irritation later. This will prevent chaffing.
Even if you don’t chafe on the bike, it’s best to change out of your sweaty clothes soon after your workout.
The best bet is to use chaffing cream and anti-chafing cream.
Chaffing cream is good to use after a ride and you can put in on before bed. While you sleep, the cream will help your skin cells heal and regenerate so you comfortably conquer another workout. The best time to use it is after a long ride.
Ant-chafing cream is applied before a workout and is powder-based cream or balm. You can lather it on and when it dries you’ll see a chalky film on your skin. It’s very easy to use and can save you from chaffing mid-workout.
Indoor Training Apps

You’ll want some way of tracking your progress and recording how a workout felt afterward.
You can use a journal and write it down, but it can get messy. And, if you’re keeping track of a lot of metrics it can take a long time to write everything down accurately.
An Excel workbook can also work, but again you have the problem of time. It’s sometimes not convenient to write everything right after a workout.
We recommend using training apps such as Zwift or Training Peaks.
If you have a coach, you can see your workouts posted on the training app, which can be synced with your sports watch such as any Garmin watch.
After the workout, you just plug your device into your computer or have it synced with your smart device. All your data will be in the app for you to review and makes it easier than manually uploading it yourself.
Strava is the best app to use if you want to track your miles and elevation goals or race with your friends.
Wahoo Fitness and Zwift are great to use especially if you have a compatible smart trainer. The app syncs with it and it will calibrate the trainer to whatever workout you have planned for the day. You can “meet” friends and race them all winter long.
Training Peaks is best if you’re working with a coach and need to track your workouts. You can see the workouts posted (sync it to your watch or trainer). You can view your coach’s pre-workout comments and you can write comments about how the workout felt afterward.
Clothes/Headband
Clothes shouldn’t be drastically different for winter training than what you wear during the summer.
A pair or two of bibs is highly recommended for winter training. It is the most comfortable and they won’t bunch, hike up, or slip down during a ride. This will help reduce the chance of chafing during a long ride.
If you don’t have bibs, no worries! Just be sure your bike shorts fit well before committing to a two-hour ride on the trainer.
Socks are an optional item to have for your bike rides. Even if your feet aren’t cold, the socks will make sure you don’t sweat through your bike shoes.
Of course, you can use the same shoes you wear outside for indoor training. In fact, it’s encouraged to use as much of the same clothing for indoor riding as outdoor.
You’ll get hot while on the trainer, even more than you do outside. For this reason, we don’t recommend wearing a jersey on a bike trainer.
A headband would be useful to catch some of the sweat dripping from your head. It’s not something you absolutely need. But, if you’re comfortable having it, then you can use it all you want!
Decoration and Inspiration
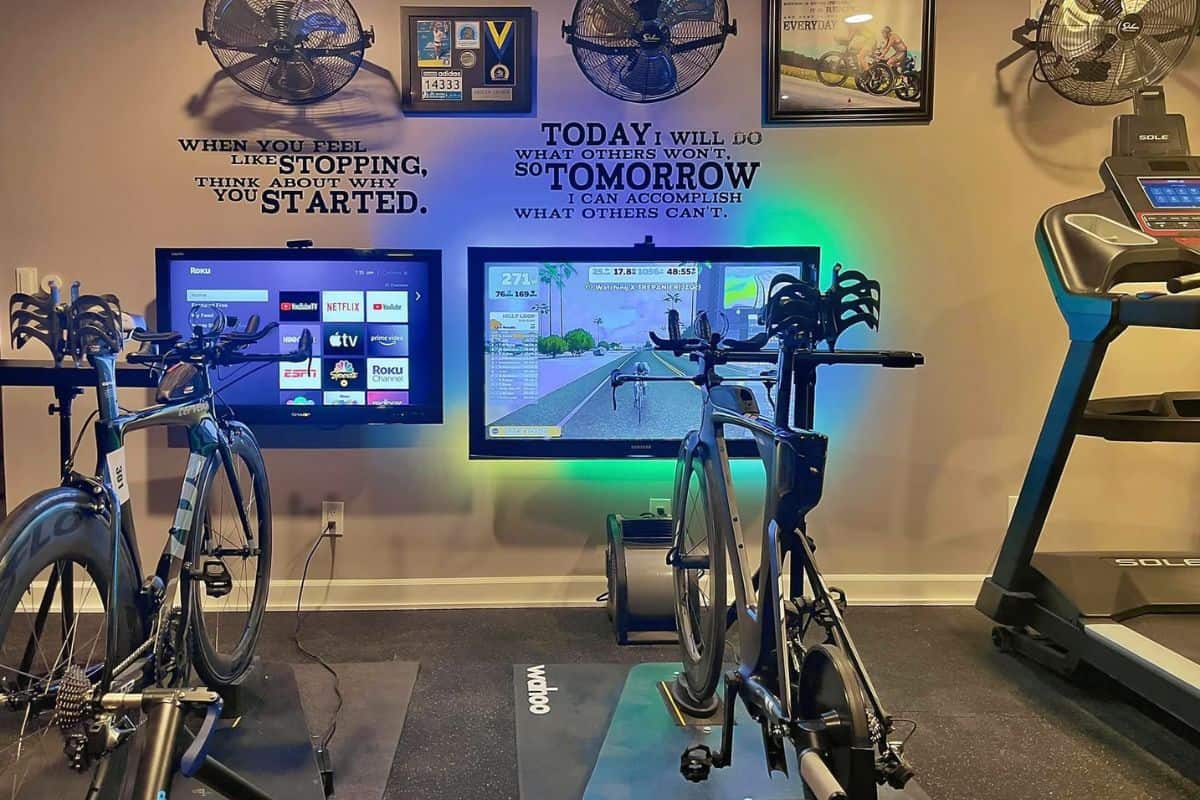
Let’s face it, we know that winter training can get very monotonous and dare we say boring.
No matter how much interactive technology you add to your pain cave, you’re still biking in place.
But, you can change how you think of winter training and keep yourself motivated with decorations and other trinkets for motivation.
You can decorate your pain cave with posters of your favorite pro-triathletes for inspiration. Or, maybe paint the walls a cheerful color and paint figures swimming, running, and biking.
Put up your old race numbers on your wall and keep adding every year. Hang up every award you’ve earned from a race. It will remind you of what is to come and why you decided to train!
A nice touch would be to hang up pictures from your races too! Either action pictures or some of the best are the ones with you and your friends before and after the race.
We hope this article has helped you get a start for your pain cave. Winter training can be draining but you can make it more bearable. It is possible to enjoy winter training just need to make sure you have the right equipment and inspiration with you.
I’d like to add to your rocker plate information. I represent Velocity Rockers, a made in USA rocker plate manufacturer. The comment about improper bike lean is certainly true with a product such as the Saris MP1, which has fixed leaf springs for side-to-side movement. As discussed in the blog linked below, improper bike lean can be avoided with a proper setup and a little technique. Thanks for such an informative blog. It will be useful for many people getting into indoor cycling. https://velocityrockers.com/blogs/cycling-fitness-articles/do-rocker-plates-encourage-poor-or-opposite-form-not-necessarily